The first step in building the data flow is adding a data source. You can add one data source if you want to connect to a single source or add multiple data sources to copy tables from different sources and create a data "mash up."
Pyramid supports a variety of data sources, including local files, relational databases, unstructured databases, web sources, and scripted sources.
Generally, once you connect to the data source you'll select the tables to add to the data flow; those tables will be copied from the source to the new Pyramid data model. Depending on your data source, you may be able to directly query the given database without copying any data into Pyramid or creating a new model output.
Selecting a Data Source
From the Elements panel to the left of your Data Flow, the sources are organized by type:
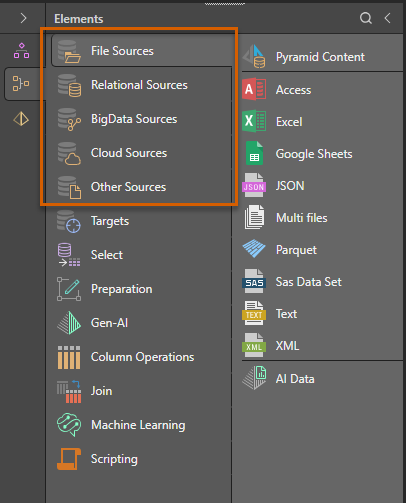
- Click here for a list of supported data sources.
Add a Source node to your Data Flow
Drag the relevant data source from the Elements panel onto the canvas.
Note: In this example, we're going to add an In Memory Server from the Relational Sources.
Specify Data Source Properties
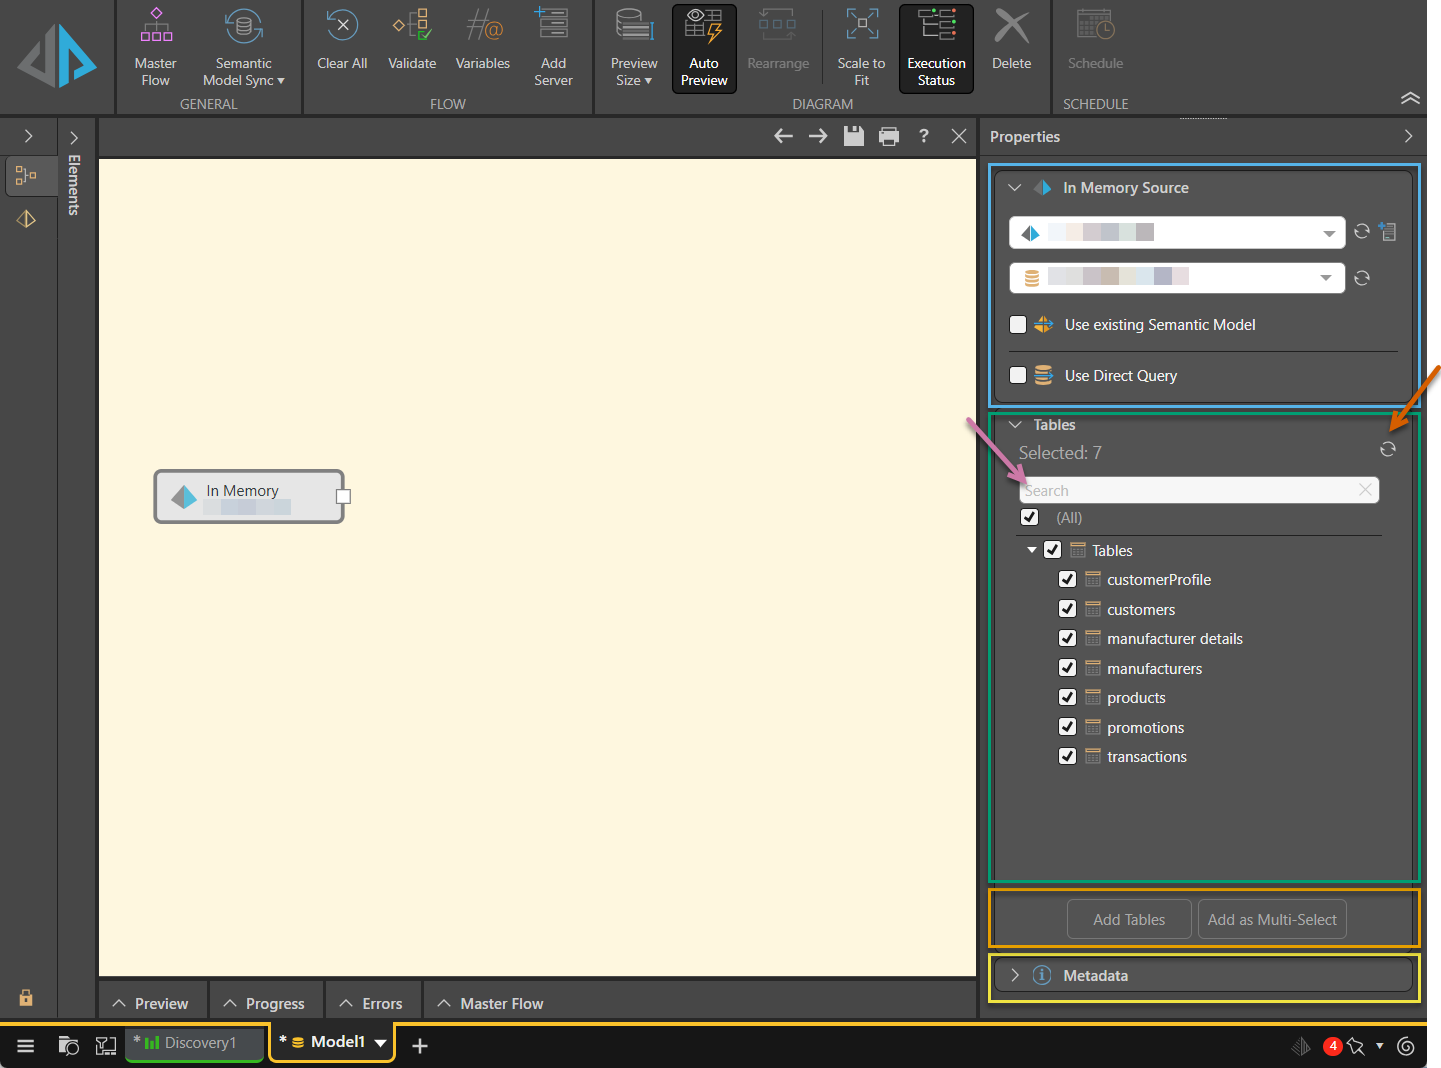
Select the Data Source node on the canvas and then use the options at the top of the Properties panel (blue highlight below) to define the source:
Select a Server and Database
Use the first two dropdown lists to select the Server and Database that you want to query.
Tip: You can use the options alongside these fields to Refresh the dropdown lists or click Add Server to add a new server.
Use existing Semantic Model
Select the Use existing Semantic Model checkbox to choose an existing semantic model, which can then be used to build a new model. For more information, see Use Existing Semantic Model.
Use Direct Query
Select the Use Direct Query checkbox to allow Pyramid to directly query selected tables in a database. For more information, see Direct Query vs Ingested Data.
Select and Create Tables
In the Tables panel (green highlight above) you are going to need to select and then add the tables:
Selecting Tables
Select the Tables you want to include in the data model from the Tables panel.
Tip: You can use Search to find tables quickly if you know their names (purple arrow above). You can also click Refresh (brown arrow) to refresh the list of tables if they have been added or removed from the data source.
Add Tables to the Data Flow
You have two options for adding your selected Tables to your Data Flow (orange highlight above):
- Add Tables: Add a Table node for each selected table. Each table may then be previewed, and columns can be removed from given tables.
- Add as Multi-Select: Add a single multi-table node for all selected tables.
Metadata
Metadata (a description, an ID, and the validate checkbox) are found beneath the Table Selection panel (yellow highlight above).
Column Selection
When Table nodes are added (orange highlights above), select a Table node on the canvas (black arrow below) to open its Preview panel and Properties panel:
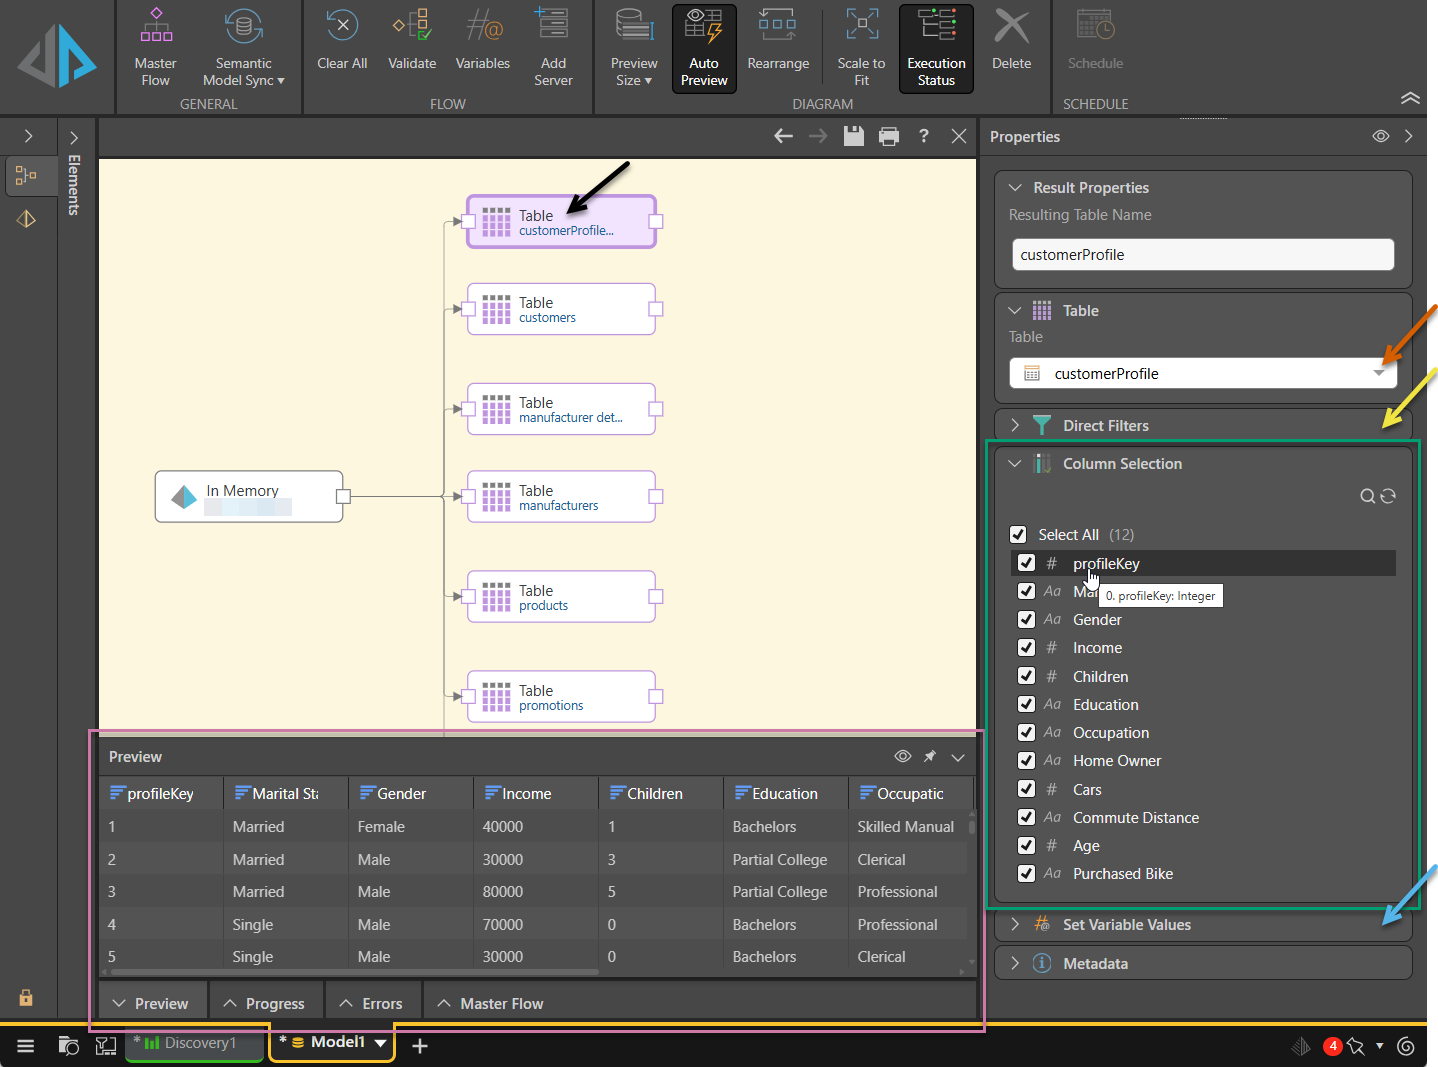
Table Properties
With a Table node selected (black arrow above), you can update some or all of the following properties:
- Result Properties: The name of the table in the new data model; you can change the table name here if required.
- Table: The table that is represented by the node. Select a different table from the dropdown list to change the table selection.
- Direct Filters*: Filter the selection criteria "inline." This option limits the query results, avoiding filtering after the query has been run. Each filter is created by selecting a column name and creating a comparison between it and another column, variable, or value.
- Column Selection: The columns in the table. Clear the checkbox (deselect) for any columns you don't want to copy into the new model. Hover your cursor over the icon (red highlight above) to view the full data type details as a tooltip.
- Set Variable Values: Create variables to enable incremental loading when the data model is reprocessed later.
- Metadata: A description, an ID, and the validate checkbox.
- For more information, see Table nodes in a Data Flow.
Tables Properties (Multi-Select)
With a Tables node selected (not shown), you can update some or all of the following properties:
- Result Properties: Lists the table names that will be given to each table in the new data model; you can change the table names here if required.
- Direct Filters*: Applies an inline filter that will be applied to each table in the new data mode. Select column names and criteria to be used for the filter.
- Tables: Lists all the tables represented by Tables node; deselect any tables that you don't want copied into the new data model.
- Metadata: A description, an ID, and the validate checkbox.
- For more information, see Multi Tables in a Data Flow.
* Direct Filters is not shown if the data source is one of the file sources (for example, if your data source is Excel).
Removing Tables
Right-click the Table or Tables node to access the following options:
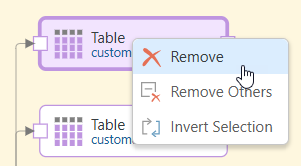
- Remove: Deletes the node.
- Remove Others: Delete all other nodes.
- Invert Selection: Select all the other nodes except this one.
Remove Tables (Multi-Select)
You can also select the Tables node and clear the checkboxes representing the tables in the Properties panel.
Related information
Data Source Authentication
If you’re using Windows Authentication or SAP Logon Tickets to connect to your data source, you may be prompted to enter Authentication credentials when saving your changes.
- Click here to learn more about Data Source Authentication.